This is out of order. We were supposed to introduce our partnership/sponsorship of the Mettle Cycling elite amateur race team to you first and then have them featured here with advice from the saddle and tales from the road. But then, well, you know – all this. So instead of showing off the cool team jersey with the Cycle Oregon logo front-and-center and details about this mission-based squad, let’s just get into some of that good advice this crew has to offer. When we get the all-clear to gather we’ll saddle up the squad in those brand new jerseys to do a photo shoot in one of our favorite Oregon places and do a proper introduction post.

Mettle Cycling is an Oregon-based brand making accessories for cycling with a little more focus on the creative side of things such as photography. Mettle founder, Randall Fransen, is as enthusiastic a photographer as he is a cyclist and through a bicycle racing team representing the brand he has found a community to ride, create, and share his passion for the bicycle. Photography has been central to the team’s identity and success, setting a standard that has seen their work appear in numerous titles, brand work, and even landing a cover shot of Randall for Bicycling Magazine.
As we ride through this wondrous state we encounter many incredible sights that we are eager to share with friends through photographs and social media. To help us be even better at taking photos while riding we asked Randall for the tips he and the Mettle crew have learned from thousands of miles and shutter snaps.
Taking Great Photos On The Bike
For the amateur rider and photographer, shooting from the bike is not entirely different from any other photography in that the basic rules should be observed. Let’s cover those briefly:
- The Rule of Thirds – when dividing the frame into 9 even squares (⅓ horizontal and ⅓ vertical), you will want to place your subject at the 4 intersections those lines create. Also, avoid splitting the horizon directly in the middle of the frame. It should either be in the lower or upper third of the frame.
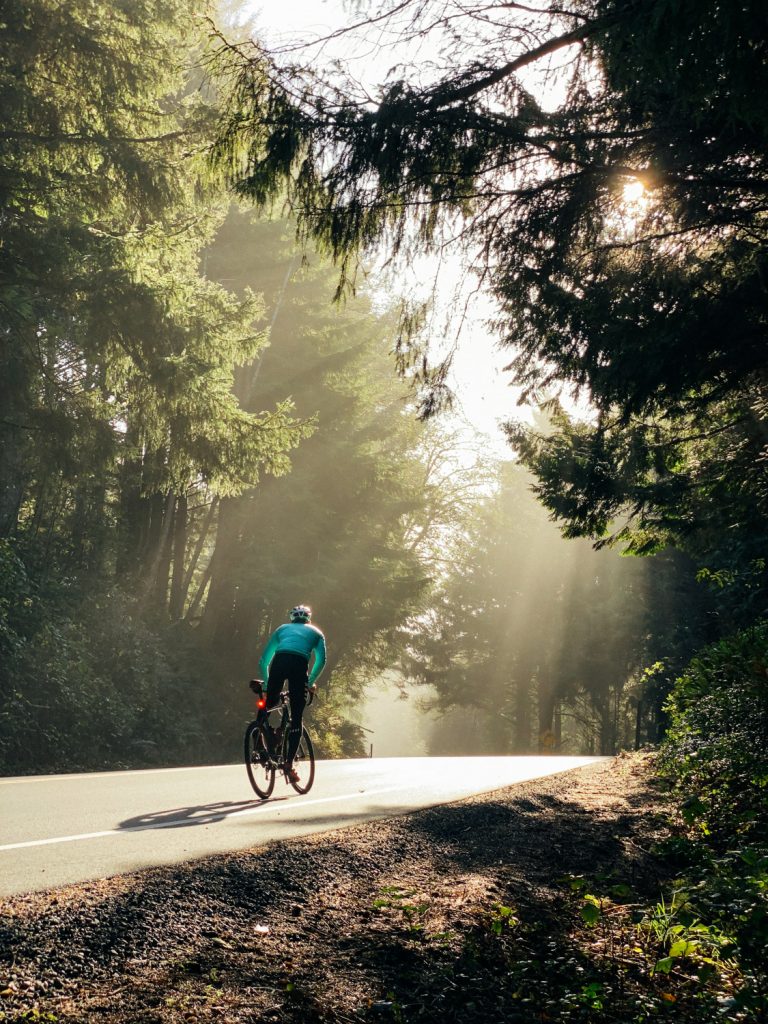
- Reduce Clutter – A shot of the road and rider with other cars, street signs, or objects is not an exciting shot. Be mindful of objects or lines that might appear as though they are growing from your subject.
- Creative Framing – aside from the image’s boundaries, natural frames to further emphasize your subject can help: bridges, arches, trees, fences, etc.
- Direct the eye with leading lines – Natural “vanishing points” like roads or fences that direct towards the subject (also placed in the correct area of the frame) will draw focus to the right place.
- Fill the Frame – either by moving in or out, zooming, or cropping with an edit tool later
- Don’t cut off limbs (or the bike) – for a full body shot, make sure your subject is all the way in the frame.
- Depth – this is not always possible with camera phones, but when using a dedicated camera with a nicer lens, your ability to create depth is easier where the background will be less focused and your subject is isolated in focus.
With the basics out of the way, let’s think more about how to use these skills to take your shooting from the bike to the next level.
The best camera is the one you have with you.
Entire Instagram careers have been made on camera phones. Others enjoy carrying a full size camera and zoom lens on the bike. Each is a powerful tool when wielded with some additional knowledge on how to get the most out of what you have. Carry what you like and capture the elements of the ride that speak for you.
SHOOTING FROM THE SADDLE:
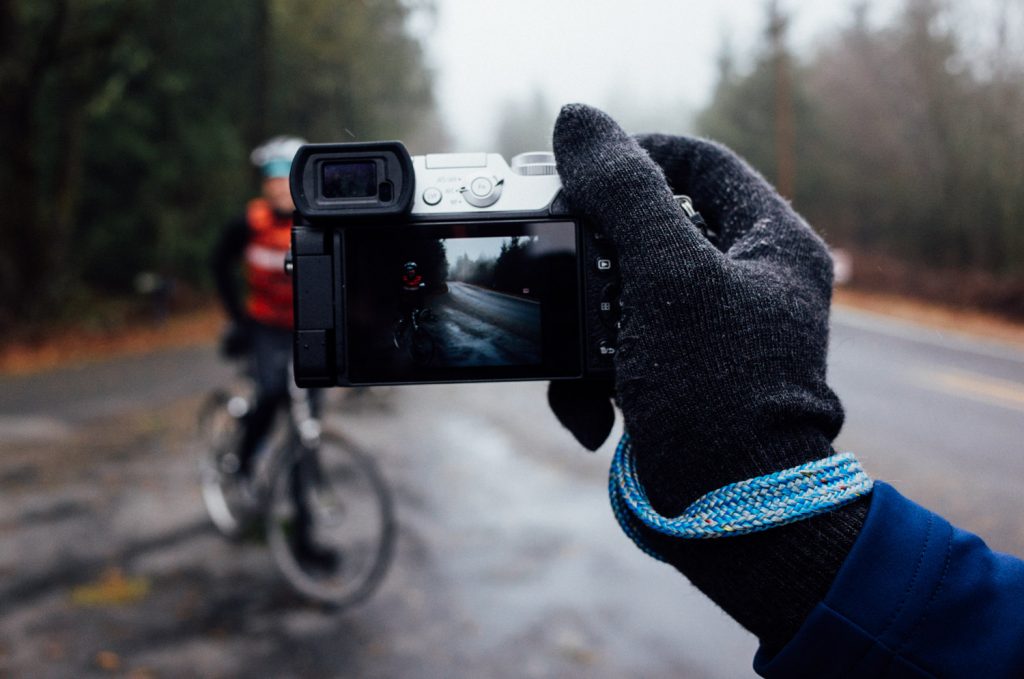
Aside from numerous opportunities to shoot your ride when off the bike, it’s important to feel comfortable and safe when only one hand is on the bars and your focus is elsewhere. Practice the basic photo techniques before you try them on the bike and be sure that you can manipulate your phone/camera by feel as your attention should always be on the road around you.
Jersey pockets are a common choice for smartphones but they can be hard to reach while riding and can get sweaty causing your phone to be slippery and lens to fog. Apparel wise, the recent development of “cargo pockets” for cycling shorts (stretch panels on the exterior of each thigh) puts your phone in a handy spot without having to be a contortionist.
Handlebar bags have become quite popular and high performance now factors into design as much as carrying capacity. Many bags have quick access pockets just for phones or small cameras that also hold them securely. A riff on the handlebar bag is the “feed bag” which is a behind the bar bag originally designed to hold a water bottle but that makes for a perfect spot to put some of the small stuff you want to get to often.
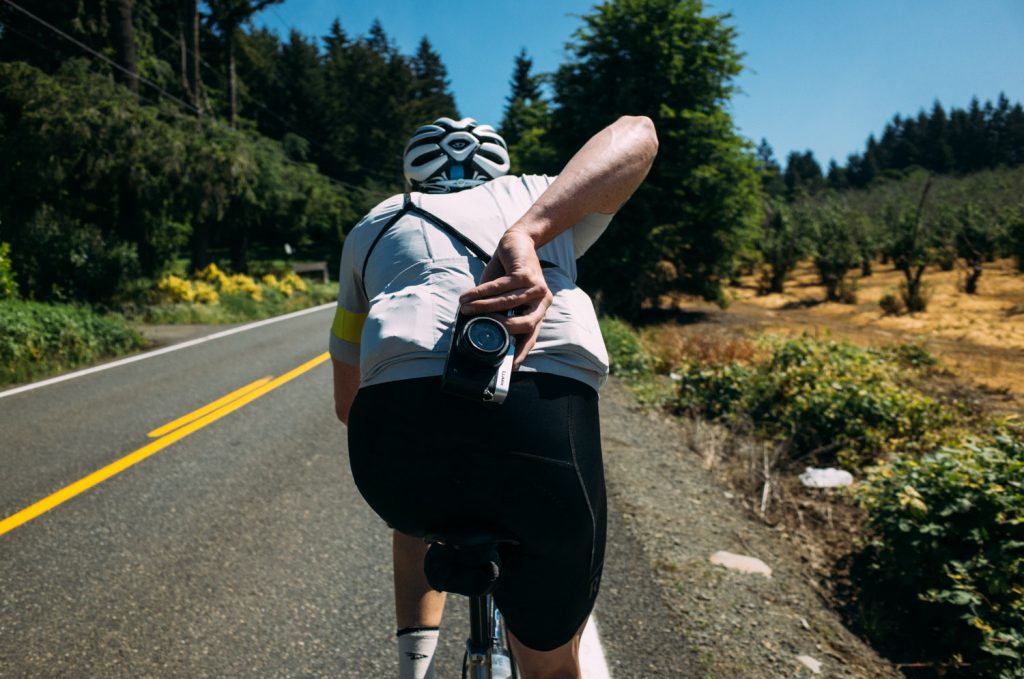
For a larger camera how you carry it depends on how quickly you want to access it. You can always carry a bar or frame bag but also, check out Mettle Cycling’s Speed Straps and Slow Straps, specifically designed for carrying your full -feature camera safely while riding the bike.
COMPOSITION:
As phones advance with multiple lens options, it’s gotten easier to replicate a lot of things that larger cameras can do including portrait mode and depth of field features. But with limited reach, it becomes necessary to think more about the frame and how best to compose a shot without a lot of depth.
Zooming in or hoping for detail in a subject that is far away should be a lower priority when capturing your image. Consider a single plane of objects within reach of your camera phone’s lens. Many of the techniques described below can help in this respect such as a “Bike against a wall” shot or using natural framing such as overhanging trees or a landmark on your ride as a supporting background to yourself or friend.
DON’T BE AFRAID TO STAGE THE SHOT:
Avoiding the stealth and unplanned shot can mean getting the best photo of the day. Ride ahead to jump up on an embankment for a new angle or send your buddy down a road that goes nowhere.
FRAME IT:
Don’t just take a shot from the side of the road – get up or move to find better composition and framing.
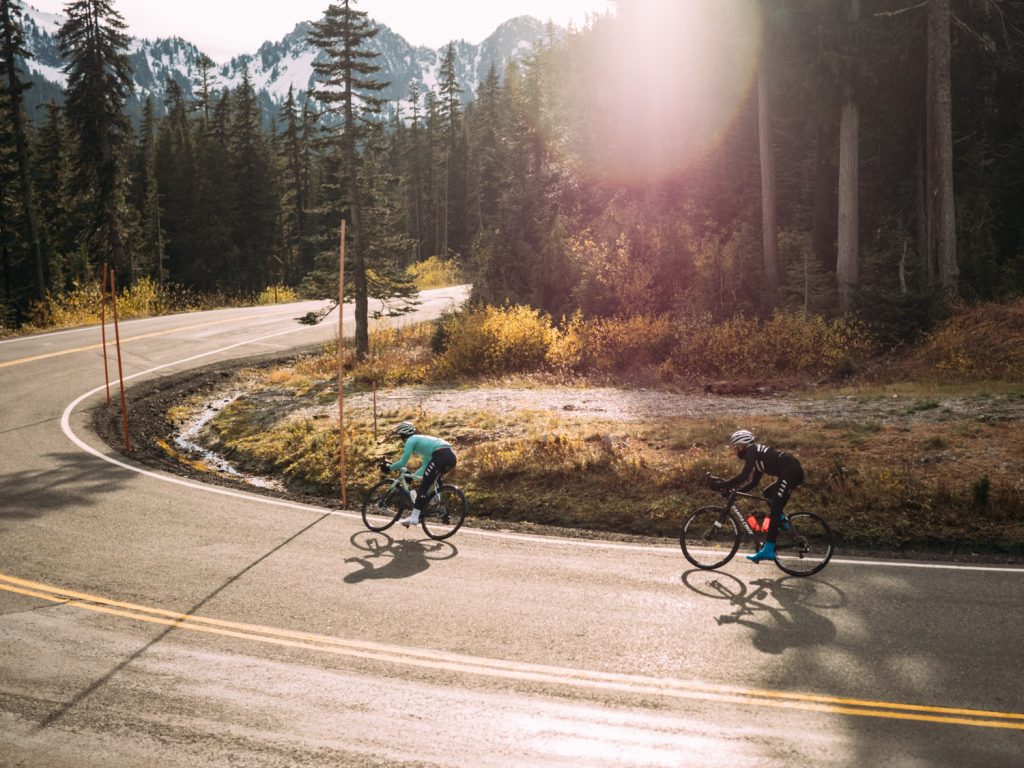
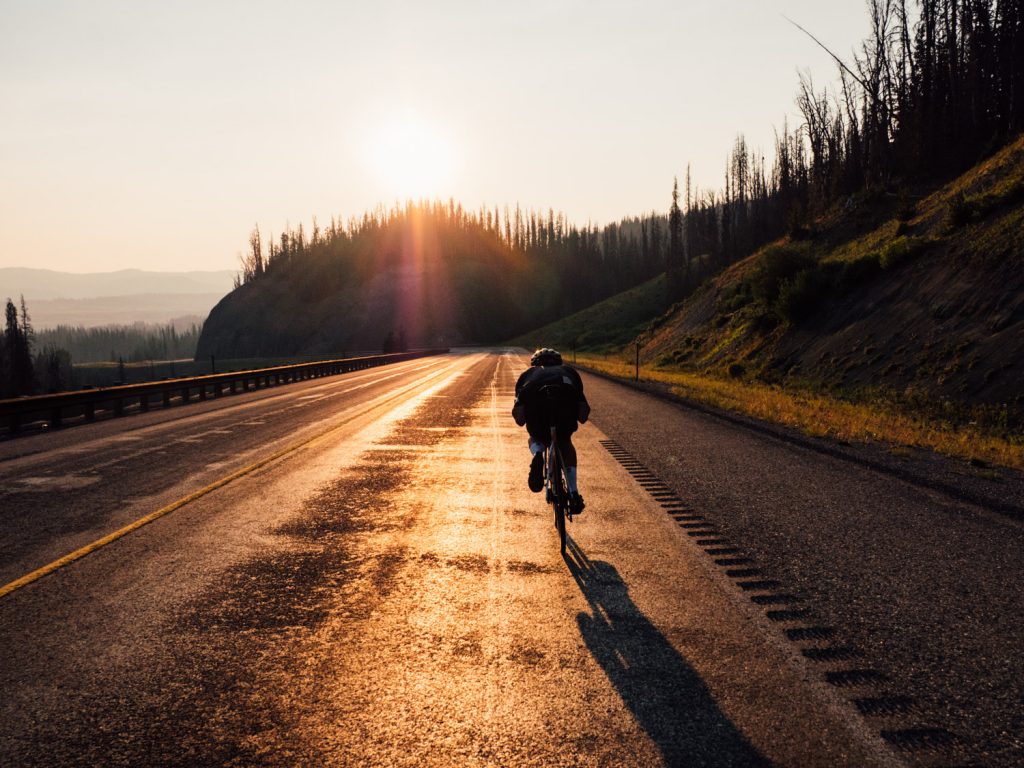
GOLDEN HOUR:
Your light source while riding is the sun in 99% of cases and knowing when it is casting good light will help tremendously. When the sun is low in the sky (morning / afternoon / evening), the light will be directed onto your subject. When the sun is high, the light casts unwanted (and often unflattering) shadows from above.
Also, be aware that when the sun is behind your subject, you will have to choose between exposing your subject properly and losing the background, or getting the background right and your subject will be too dark. Usually you want your subject facing the sun but the road often dictates who gets to stand where. Just be aware of where the sun is, your cameras settings, and your willingness to work on an image in editing later on.
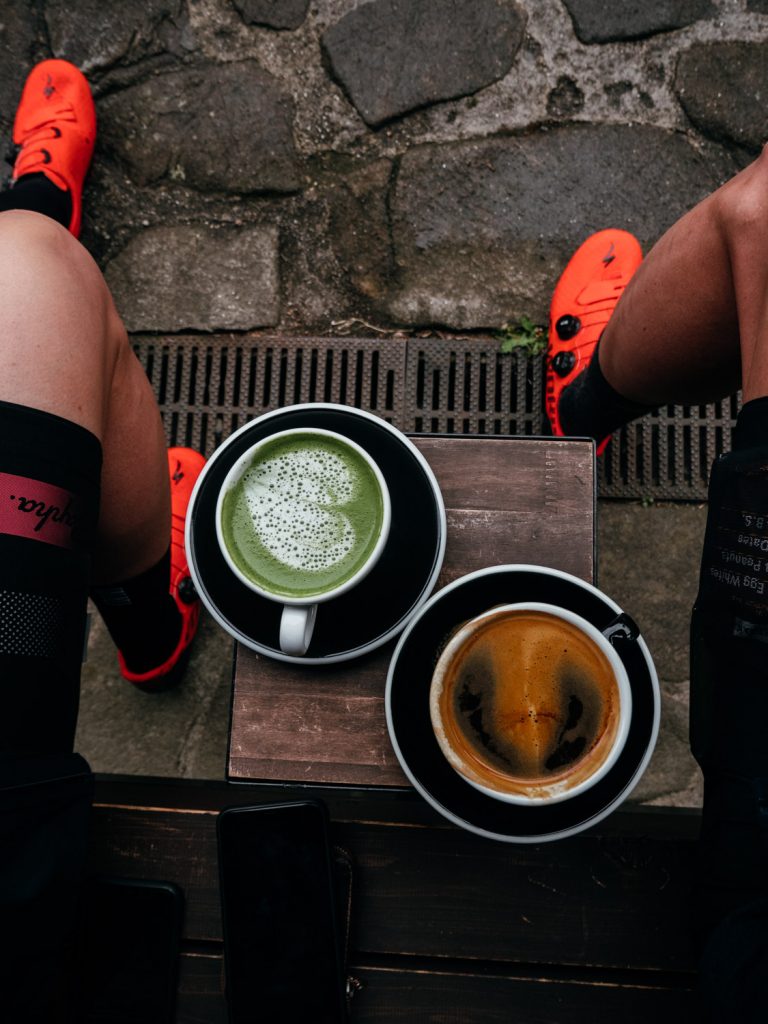
NOT ALL “CYCLING PHOTOGRAPHY” IS ABOUT THE ACTUAL CYCLING:
The in-between moments of the ride are just as good as the views. In many cases, a view or sunset just can’t be fully captured but a story of the day can be wrapped up in other events. Cycling has so many traditions and peripheral pursuits, the opportunity to tell a story goes far beyond how far you rode.
EDITING:
It’s likely some of your favorite cycling photographers have their own “look” – whether that’s from a $5000 camera or an iPhone, these photographers don’t post their shots immediately. Instead, there is time spent with photo editing software either on the phone or computer. This type of editing allows for the photo to be “stylized” instead of raw, flat out of the camera. Here are some of my favorite apps for editing your photos on your phone:
VSCO – free with in-app filter purchases
- Offers the most “stylized” filters and will be much better quality than Instagram’s in-app filters
Snapseed – Google’s photo editor
- Adjustments like contrast, vignette, and saturation can help your image pop.
Lightroom – requires a license, for advanced users.
DO’S AND DON’TS
Do:
- Do practice your technique. Can you reach your camera one-handed, while riding, and put it back? Do you know the angle to hold it over your shoulder or how low you can reach down and still snap the shutter? If you plan on shooting while riding add this element of training and practice just as you would any other element of fitness training.
- Take pictures of dogs you meet!
- Take burst photos (4-7 shots per second) and pick the best one
- Try black and white – if the color isn’t looking right, get rid of it!
- Take an extra 30 seconds to frame your shot, then take another. And another. Small differences can be huge in the end.
- Straighten and crop your photos. The Rule of Thirds can be achieved when cropping and always make sure your horizon line is straight across. If there is not a horizon in your shot, use other right angles to make sure it is straight.
- When you’re the photo subject – Get in your riding position and look ahead, add some interest and dramatic effect by not looking at the camera.
Don’t:
- Fill your camera roll with “cyclist butts” Shooting closely from behind is rarely interesting or flattering
- Cut off shadows in your framing. Riders and bikes make lovely shadows that are such a nice balance to the physical.
- Rush to get a post up. Take time to make the best image possible, then edit it indoors.
- Immediately delete bad photos. Did you consistently frame someone’s head out of the shot or get your helmet in the frame in an over-the-shoulder shot? Think back to your form and technique and make adjustments from what these images tell you.
- Over edit your photos. Not every detail needs to be seen through over-exposure or cranking up the shadows. Over saturated images or contrast that’s too high or too low will distract.
- Use Instagram filters.
- Shoot every shot vertically (portrait). It’s OK to turn the phone (landscape) for a wider frame when needed.
KNOW THE RULES TO BREAK THE RULES
Remember “no cyclist butts”? Break that rule if you get a shot or sunset like this!
Photos taken with my phone camera:

Thank you, Randall, we look forward to seeing your summer riding, (lots of selfies on solo rides, right?) and we look forward to more from the Mettle Cycling crew.
I’m looking for a camera to take on rides, any recommendations, what do you use?
Hi, James! Here are some popular cameras (including the one I currently use):
Ricoh GR – small enough for a jersey pocket, great fixed lens
Sony RX series – small enough for a jersey pocket, zoom lens
Sony A6000 series – Same body size as the Ricoh with interchangeable lenses
Panasonic Lumix series (I have a GX8) – slightly larger with interchangeable lenses, micro 4/3 format
Sony A7 series – Full frame camera, proven professional tool
Why shoot every shot in portrait vs. landscape? I do the opposite.
I believe that recommendation was under “Do Nots”; so don’t shoot *everything* vertically. 🙂
Let the subject/context dictate the orientation. And sometimes just change it up if you’ve been doing a lot of one.
Found a local route in my area with great views, looking to take some pictures soon and share.